Upgrading to the Quest 3 is less about specs and more about a calculated financial decision on your total VR ecosystem.
- The visual and mixed-reality upgrades are significant, but they introduce hidden costs from largely incompatible accessories.
- Maximizing the resale value of your Quest 2 is a crucial strategy to make the upgrade economically viable.
Recommendation: If your primary bottleneck is visual fidelity and you’re prepared to reinvest in accessories, the upgrade is justified. Otherwise, optimizing your current Quest 2 setup may offer a better return on investment.
For existing Quest 2 owners, the arrival of the Meta Quest 3 presents a classic tech dilemma. The spec sheet promises a leap forward, but at a significant cost. The real question isn’t just whether the new headset is “better”—it clearly is—but whether it offers enough tangible value to justify a roughly $500 investment, especially when you have a perfectly functional device already. Many reviews focus on raw performance, comparing processors and resolutions. They’ll tell you the pancake lenses are clearer and the profile is slimmer. This is all true, but it misses the core financial calculation for a current user.
The decision to upgrade is an economic one, rooted in the concept of Total Cost of Upgrade (TCU). This goes beyond the sticker price. It must account for the “ecosystem inertia”—the investment you’ve already made in Quest 2-specific accessories that may become obsolete. It also involves understanding the resale depreciation curve of your old hardware to offset the cost. Is the jump in performance significant enough to render your current setup inadequate, or are you just chasing the latest trend?
This analysis moves past the simple spec comparison. Instead, we will dissect the upgrade as a strategic financial choice. We will evaluate the true value proposition of each key new feature, identify the hidden costs associated with accessory incompatibility, and outline a plan for maximizing the return on your investment. By the end, you won’t just know if the Quest 3 is better; you’ll have a framework to determine if it’s the right financial move for your specific situation.
To help you make an informed financial decision, this guide breaks down the critical factors, from the real-world impact of new features to the hidden costs you must consider.
Summary: Analyzing the True Cost of a Quest 3 Upgrade
- Why Color Passthrough Changes How You Use VR at Home?
- How to Transfer Your Game Library to a New Headset Without Data Loss?
- The Strap Compatibility Issue: Will Your Old Accessories Fit?
- Wi-Fi 6E vs Cable: Which Is Necessary for the New High-Res Screens?
- When to Sell Your Old Headset to Maximize Resale Value?
- How to Reduce Latency to Under 20ms for Competitive Cloud Gaming?
- How to Use Supersampling to Sharpen VR Visuals Without Lag?
- Haptic Suits: Are They Worth the $500 Investment for VR Gaming?
Why Color Passthrough Changes How You Use VR at Home?
The single most-touted feature of the Quest 3 is its full-color, high-resolution passthrough, turning it from a pure VR device into a capable mixed-reality (MR) headset. Unlike the grainy, monochrome view on the Quest 2, the Quest 3 provides a usable, real-time video feed of your surroundings. From a value-per-feature perspective, this is a significant leap. Technical specifications show the Quest 3’s color passthrough delivers 18 pixels per degree (PPD), which is a tenfold improvement over Quest 2 and even higher than the Quest Pro. In practice, this means you can comfortably check your phone, grab a drink, or interact with someone in the room without removing the headset.
This capability fundamentally alters the device’s role in a home environment. It lowers the friction of using VR for short bursts, as you’re no longer completely cut off from your surroundings. Games and apps can now place digital objects in your actual living room, creating a new layer of immersion. However, the financial question remains: is this convenience worth a portion of the $500 upgrade cost? For developers and early adopters fascinated by the potential of MR, the answer is an unequivocal yes. As Paul Furgale, a Director of Engineering at Meta, noted in the Meta Engineering Blog:
after Quest 3, I’m convinced that Passthrough and MR will be a standard feature on all future headsets
– Paul Furgale, Meta Engineering Blog
This suggests that investing in the Quest 3 is a form of future-proofing your VR setup. While the current library of dedicated MR apps is still growing, the hardware capability itself represents a significant part of the upgrade’s value proposition. For the average gamer, the immediate benefit is convenience, but the long-term benefit is access to a new class of experiences that the Quest 2 simply cannot support.
How to Transfer Your Game Library to a New Headset Without Data Loss?
One of the biggest anxieties for an existing user considering an upgrade is the fate of their digital game library. Having spent hundreds of dollars on titles, the thought of losing that investment is a major deterrent. Fortunately, this is one area where the financial calculation is overwhelmingly positive. Your game library is tied to your Meta account, not the physical hardware. This means the transition from a Quest 2 to a Quest 3 is remarkably seamless.
When you set up your new Quest 3 with the same Meta account, your entire library of purchased games and apps will be available for download from the store at no additional cost. This is a critical point: your largest and most valuable digital asset transfers completely. The process is as simple as logging in and reinstalling your favorite titles. The system is designed to encourage ecosystem loyalty and remove this specific friction point from the upgrade path.
What about game progress? For many titles, Meta’s Cloud Backup feature handles this automatically. If enabled on your Quest 2 (Settings > System > Backup), your game saves are periodically uploaded to the cloud. When you install that game on your Quest 3, it will automatically pull down the latest save file. While not every single game supports this feature, the vast majority of popular titles do. This ensures that you not only keep your games but also your hard-earned progress, making the software side of the upgrade virtually painless and cost-free.
The Strap Compatibility Issue: Will Your Old Accessories Fit?
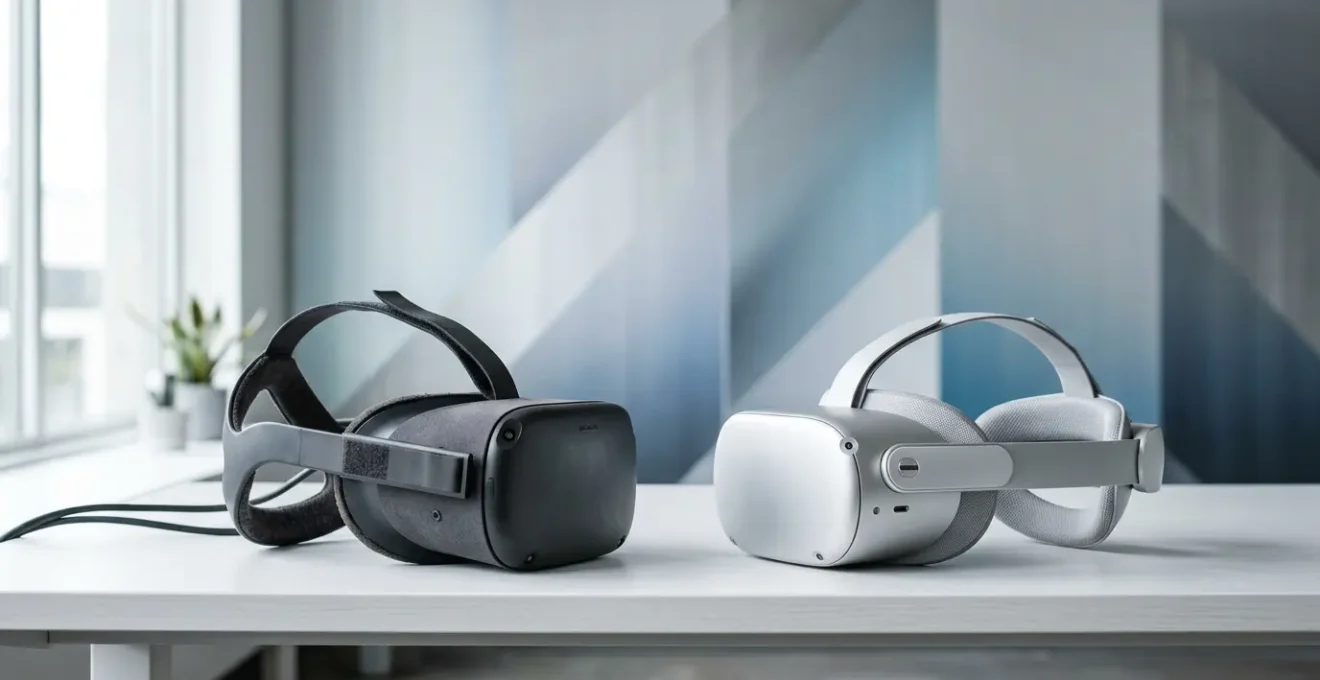
While your software library transfers seamlessly, your physical accessories are a different story. This is where the “Total Cost of Upgrade” (TCU) begins to climb. Meta redesigned the Quest 3 to be significantly sleeker, with a 40% thinner profile than the Quest 2. While this improves comfort and aesthetics, it fundamentally changes the device’s form factor, rendering most of your Quest 2-specific accessories obsolete.
The most significant point of incompatibility is the head strap. The mounting points on the Quest 3 are completely different, meaning your beloved Elite Strap, battery strap, or third-party halo strap from your Quest 2 will not fit. This is a major hidden cost, as many users have spent $50-$100 on a more comfortable strap solution. The same applies to facial interfaces and controller grips. The Quest 3’s new shape and ring-less controllers mean you will have to repurchase these essential comfort and usability items. The following table, based on publicly available specifications, breaks down the compatibility issues:
| Accessory Type | Quest 2 Compatibility | Quest 3 Compatibility | Status |
|---|---|---|---|
| Head Straps (OEM) | Standard elastic strap | New thinner design | Not Compatible |
| Controllers | Tracking ring design | Ring-free, TruTouch haptics | Not Compatible |
| Link Cables (USB-C) | Supported | Supported | Fully Compatible |
| Battery Packs (universal) | USB-C power delivery | USB-C power delivery | Fully Compatible |
| Facial Interfaces | Quest 2 specific fit | Quest 3 specific fit | Not Compatible |
The only major accessories that remain compatible are universal ones, such as your Link Cable (as long as it’s a quality USB-C cable) and external USB-C battery packs. For anyone who has invested heavily in a customized, comfortable Quest 2 setup, the cost of replicating that setup on a Quest 3 could easily add $100-$200 to the total upgrade price. This factor must be a central part of your financial calculation.
Wi-Fi 6E vs Cable: Which Is Necessary for the New High-Res Screens?
The Quest 3’s higher-resolution display is a major selling point, but to fully leverage it for PCVR gaming, your data connection needs to be robust. This raises a key financial question: is an investment in a new Wi-Fi 6E router necessary? The Quest 3 is one of the first mainstream headsets to support Wi-Fi 6E, which offers access to the less congested 6 GHz band. For wireless PCVR streaming via Air Link or Virtual Desktop, this can be a game-changer.
Wi-Fi 6E’s primary advantage isn’t just raw speed, but significantly lower latency and less interference. In a crowded apartment building with dozens of competing 2.4 GHz and 5 GHz networks, the 6 GHz band is like having a private, empty highway. Research has shown that Qualcomm’s Wi-Fi 6E chips deliver VR-class low latency of less than 3ms, ensuring a more stable and responsive connection. This is crucial for feeding the high-resolution screens of the Quest 3 without compression artifacts or stuttering.
Case Study: Wi-Fi 6E in Congested Environments
Real-world tests in environments with over 50 competing Wi-Fi networks demonstrate the tangible benefit of the 6 GHz band. According to a study from Cudy, using a 6 GHz connection reduced latency by approximately 40% and jitter by 80% compared to 5 GHz. This resulted in a noticeably smoother VR streaming experience, even with a physical wall between the router and the play space, a scenario where higher-frequency signals typically struggle.
So, is it necessary? Not strictly, but it is highly recommended to unlock the headset’s full potential. A good Wi-Fi 6 router on a clean 5 GHz channel can still provide a great experience. However, if you are a serious PCVR user and live in a wireless-congested area, a Wi-Fi 6E router (another $150-$300 investment) should be factored into your Total Cost of Upgrade. A wired connection via a Link Cable remains the most reliable option, but for those chasing the ultimate wireless freedom, the path leads to a network upgrade.
When to Sell Your Old Headset to Maximize Resale Value?
The most effective way to reduce the net cost of your Quest 3 upgrade is to sell your existing Quest 2. This is not just an afterthought; it’s a strategic financial move. The key is timing. The “resale depreciation curve” for consumer electronics is steep. The longer you wait, the less your old hardware will be worth, especially as Meta continues to sell new Quest 2 units at a reduced price. For instance, as of 2025, the Quest 2 retails for $199.99 USD for 128GB version, setting a ceiling on the used market price.
The optimal time to sell is typically just before or immediately after a major new product announcement, or during a holiday season when demand for used electronics is high. To maximize your return, you should:
- Clean the device thoroughly: This includes the lenses (with a microfiber cloth), the straps, and the controllers. Presentation matters.
- Include all original accessories: The box, charger, and cable add perceived value.
- Bundle your old Quest 2-specific accessories: Since they aren’t compatible with the Quest 3, sell them as a complete package with your old headset. An “upgraded” bundle with a better strap and grips is more attractive to a first-time buyer.
- Be transparent about its condition: Honesty about any cosmetic scuffs builds trust and prevents disputes.
Your goal should be to recover at least 30-50% of the Quest 3’s purchase price from the sale of your Quest 2 bundle. By treating your old headset as a valuable asset and timing its sale correctly, you can transform the $500 upgrade into a much more manageable $250-$350 investment.
How to Reduce Latency to Under 20ms for Competitive Cloud Gaming?
Once you’ve made the investment in a Quest 3, your focus shifts to maximizing its performance, especially for demanding applications like competitive PCVR gaming. Achieving latency under 20ms is the holy grail for a smooth, responsive wireless experience, and it requires a finely-tuned setup. It’s not just about having a powerful PC; your network configuration is the most critical component in the chain.
The process involves a systematic optimization of your entire wireless pipeline, from the router to the headset’s software settings. Even with the best hardware, a poorly configured network can introduce significant lag and stutter, negating the benefits of the Quest 3’s superior processing power. The goal is to create a clean, high-bandwidth, and low-interference connection dedicated to the VR stream. This involves choosing the right Wi-Fi channels, using the most efficient video codecs, and managing your bitrate effectively to adapt to network fluctuations without compromising visual quality.
For PCVR enthusiasts, this level of tweaking is part of the hobby. It’s about taking control of your hardware to extract every ounce of performance. Mastering these settings ensures that your in-game actions translate to the screen with near-instantaneous feedback, a requirement for any competitive title. The following checklist provides a concrete path to achieving this low-latency target.
Action Plan: 5-Step Latency Optimization Guide for Quest 3 PCVR
- Upgrade to a Wi-Fi 6 or 6E router with dedicated 5 GHz or 6 GHz band support, ensuring connection speeds of at least 2400 Mbps for optimal streaming.
- Configure your router to use a clean, non-overlapping channel (80 MHz or 160 MHz bandwidth) to minimize interference from neighboring networks.
- Enable the AV1 codec in Virtual Desktop or Air Link settings to take advantage of Quest 3’s hardware support for better visual quality at lower bitrates.
- Set bitrate to dynamic mode with a cap between 150-200 Mbps, allowing the headset to adapt to network conditions automatically.
- Position your router with clear line-of-sight to your play area, ideally 6-10 feet away, as 6 GHz signals have reduced wall penetration compared to 5 GHz.
How to Use Supersampling to Sharpen VR Visuals Without Lag?
Supersampling is a technique used to render a game at a higher resolution than the display’s native resolution and then scale it down. This process effectively acts as a high-quality anti-aliasing method, resulting in a much sharper, clearer, and more stable image. For Quest 2 users, cranking up the render resolution in the Oculus PC app or SteamVR was a common way to fight the blurriness caused by screen-door effect and lens limitations. With the Quest 3, the calculus of supersampling changes significantly.
The Quest 3’s display is a massive step up. The headset features a 30% higher resolution at 2064×2208 per eye, combined with the superior clarity of its pancake lenses. This means the baseline visual fidelity is already far beyond what the Quest 2 could achieve, even with heavy supersampling. The law of diminishing returns applies here: the sharper the native display, the less perceptible the benefit of extreme supersampling becomes.
As the testing team at Trusted Reviews noted when comparing the headsets:
The level of detail between the two can only be described as day and night, with text being clearly legible and texture looking a lot smoother and more realistic
– Trusted Reviews Testing Team, Meta Quest 3 vs Meta Quest 2 Comparison Review
So, how should you approach it? Instead of pushing for 1.5x or 1.7x render resolution as you might have on a Quest 2, start with a more modest 1.2x to 1.3x on the Quest 3. This provides a noticeable sharpening effect without demanding excessive performance from your GPU. The goal is to find the sweet spot where you gain visual clarity without introducing lag or frame drops. The Quest 3’s superior baseline means you can achieve a “god-tier” visual experience with a much lighter performance footprint, freeing up GPU resources for higher in-game settings or more stable frame rates.
Key Takeaways
- The Quest 3 upgrade is a financial calculation where hidden costs (accessories) and asset liquidation (resale) are as important as specs.
- Full-color passthrough and higher-resolution screens offer tangible benefits, but require network optimization (and potentially a new router) to be fully realized.
- Your software library is safe, but your physical accessory ecosystem will need to be rebuilt, adding a significant percentage to the total upgrade cost.
Haptic Suits: Are They Worth the $500 Investment for VR Gaming?
As you weigh a $500 investment in a new headset, it’s worth putting that cost into a broader context. What else could that $500 buy you in the VR ecosystem? One of the most compelling alternative investments is a haptic suit or vest. While the Quest 3 upgrade enhances what you see, a haptic suit fundamentally changes what you feel, adding a new dimension of immersion that visuals alone cannot provide.
Haptic suits, like the bHaptics TactSuit or OWO Haptic Suit, are vests or full-body outfits embedded with dozens of vibration motors. These motors are precisely controlled to simulate in-game sensations: the impact of a bullet, the rumble of a nearby explosion, the pitter-patter of rain, or the satisfying thud of landing a punch. This technology is moving from a niche novelty to a supported peripheral, with a growing number of native game integrations. At CES 2024, hands-on tests of the bHaptics TactSuit X40, which features 40 individual motors, showed its ability to provide precise, directional feedback that significantly deepened the sense of presence in VR. With compatibility for over 200 titles across SteamVR and Quest, its utility is no longer purely theoretical.
From a financial perspective, the value proposition is fascinating. For roughly the same price as a Quest 3 upgrade, you could instead add a powerful haptic vest to your existing Quest 2 setup. The choice becomes: do you want a sharper, clearer world, or do you want a more physically interactive world? There’s no right answer, but it’s a critical question to ask. For a player who values immersion above all else, a haptic suit might offer a greater leap in experience than a simple resolution bump. This is especially true as the market matures; the global VR haptic suit market was valued at $5.37 billion in 2024 and is projected to grow substantially, indicating a strong future for the technology.
Ultimately, the decision to upgrade from a Quest 2 to a Quest 3 is a personal financial audit. By calculating your Total Cost of Upgrade—factoring in rebuying accessories and the potential need for a new router—and subtracting the realistic resale value of your current hardware, you can arrive at the true net cost. Then, you can weigh that final number against the tangible benefits of sharper visuals and mixed reality. For some, the investment will be a clear win. For others, optimizing their existing Quest 2 and perhaps investing the difference in a haptic suit will provide a greater return on immersion. The power is now in your hands to make the right choice for your budget and your playstyle.