The brightest TV is not automatically the best for a bright room; true performance depends on light control, not just peak brightness.
- QLEDs achieve higher peak brightness, which helps combat ambient light, but can suffer from backlight blooming and higher energy consumption.
- OLEDs offer perfect black levels and superior contrast, which can be diminished by reflections, but newer models have significantly improved brightness and anti-glare technology.
Recommendation: Evaluate your room’s specific lighting conditions and viewing habits. Prioritize a QLED for overpowering direct sunlight, but consider a modern OLED for its superior contrast and efficiency in moderately bright, controlled environments.
If you’re in the market for a premium television, you’ve been thrown into the center of a technical battle: OLED versus QLED. Marketing materials bombard you with acronyms and promises, often focusing on one simple metric: brightness. The common wisdom states that QLED TVs, with their powerful backlights, are the undisputed champions of bright, sunlit living rooms, while OLEDs are best reserved for dark, cinema-like environments. This simplification, however, misses the bigger picture and the nuances that determine a truly great viewing experience.
The assumption that more brightness (measured in nits) is always the answer is a platitude that ignores critical factors. How does a screen handle reflections? What happens to color accuracy when the display is pushed to its maximum output? Are there hidden performance costs, like input lag or increased power consumption, associated with those “vivid” bright-room picture modes? The truth is, managing ambient light is a far more complex challenge than simply overpowering it with raw luminance.
This article will move beyond the marketing noise. Instead of just comparing peak brightness figures, we will adopt a calibration expert’s perspective to explore how these two technologies fundamentally control light. We’ll analyze everything from the risk of burn-in at high brightness and the reality of 4K versus 8K resolution, to the often-overlooked issues of processing latency and the real-world impact on your energy bill. Our goal is to equip you with the technical understanding needed to choose the right technology not just for a bright room, but for *your* bright room.
To provide a complete picture, this guide breaks down the key technical considerations that matter most in a real-world home environment. The following sections will walk you through the critical factors, from display longevity to hidden performance trade-offs, helping you make a truly informed decision.
Summary: Decoding the OLED vs. QLED Bright Room Debate
- Why Static Images Can Ruin Your OLED TV Permanently?
- How to Calibrate Your 4K TV for Cinema Accuracy Without Tools?
- The Wall-Mounting Mistake That Destroys 1 in 50 Large Screens
- 4K vs 8K: Is the Upgrade Visible at a 3-Meter Viewing Distance?
- How to Fix Lip-Sync Delay on Smart TVs Connected to Soundbars?
- How to Use Supersampling to Sharpen VR Visuals Without Lag?
- Why Overlaying Schematics on Reality Reduces Assembly Errors?
- Can Smart Home Devices Really Save You 20% on Energy Bills?
Why Static Images Can Ruin Your OLED TV Permanently?
The term “burn-in” is the spectre that haunts every OLED discussion. It refers to permanent image retention, where static elements like news channel logos or video game health bars leave a ghostly imprint on the screen. This occurs because the “O” in OLED stands for organic, and these light-emitting compounds degrade over time. When one group of pixels is consistently asked to shine brighter and more often than its neighbors, it ages faster, resulting in a permanent discrepancy. In a bright room, this risk is amplified. To compete with sunlight, you’re forced to increase the panel’s brightness, sometimes to its maximum level.
This isn’t just a theoretical concern; there’s a direct correlation between brightness and the speed of degradation. Research confirms that using the TV at 80-100% brightness significantly accelerates the degradation of organic compounds. For a QLED TV, which uses an inorganic Quantum Dot layer and a separate LCD/backlight system, this type of permanent burn-in is not a concern. Its pixels don’t age in the same way, making it inherently more resilient to static content at high brightness over thousands of hours.
However, modern OLED manufacturers have implemented a suite of powerful mitigation technologies. These include pixel shifting, which subtly moves the entire image to vary pixel usage, logo luminance detection that dims static logos, and automated screen savers. While these features are highly effective, the fundamental risk in a bright room remains: the brighter you run your OLED, the more you accelerate its aging process. It’s a critical trade-off between immediate viewing comfort and long-term panel health.
How to Calibrate Your 4K TV for Cinema Accuracy Without Tools?
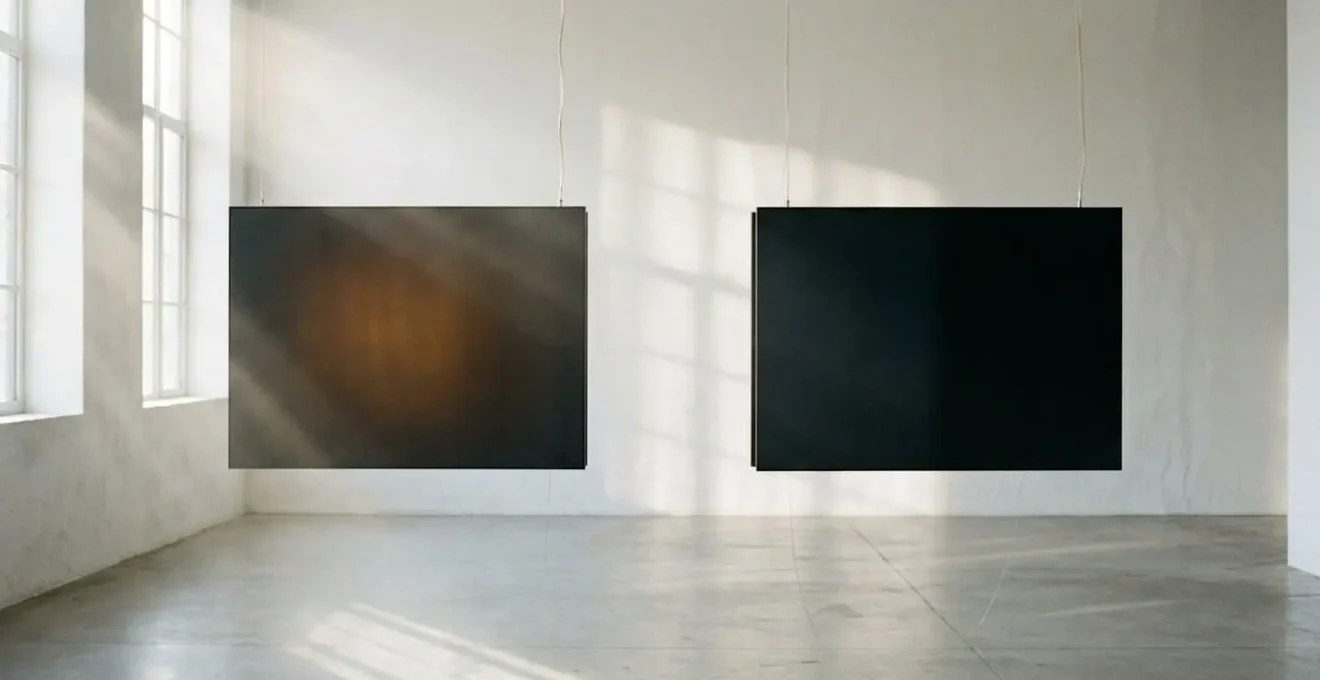
Out of the box, most TVs are set to a “Vivid” or “Dynamic” picture mode. These modes crank up brightness, contrast, and color saturation to stand out on a bright showroom floor. In a home environment, especially a bright one, this creates an inaccurate and often harsh image. True calibration aims to reproduce the content as the creator intended, which requires balancing the TV’s output with the room’s ambient light. You don’t need expensive tools to make significant improvements; you need to understand the principles of light control.
The first step is to switch to “Filmmaker Mode” or “Cinema/Movie” mode. These presets immediately disable most of the aggressive processing and aim for a color temperature of 6500K (D65), the standard for film and television. From this accurate baseline, you can make subtle adjustments for your bright room. Instead of just maxing out the “Brightness” setting (which often controls black levels), focus on the “Backlight” (for QLED) or “OLED Pixel Brightness” control. Increase this just enough to make the image “pop” without washing out details in the darkest parts of the scene.
As the illustration above demonstrates, ambient light has its own color temperature. Cool daylight from a window will make the screen appear bluer, while warm indoor lighting can give it a yellow cast. Many modern TVs have ambient light sensors that can adjust both brightness and color temperature automatically. While convenient, these can sometimes be overly aggressive. For best results, try adjusting the color temperature setting manually (e.g., from “Warm 2” to “Warm 1”) to find a balance that looks natural to your eye in your specific lighting. The goal is a comfortable, clear picture, not a retina-searing beacon.
Most of Samsung’s QLED TVs can produce anywhere between 1,000 and 2,000 nits of brightness.
– National Interest Tech Analysis, OLED vs. QLED: What to Choose in a Bright Room?
The Wall-Mounting Mistake That Destroys 1 in 50 Large Screens
Choosing the right TV is only half the battle; how you install it can dramatically affect its performance and lifespan, especially for high-brightness models. The most common mistake homeowners make is choosing a fixed, low-profile mount that presses the TV almost flush against the wall. While aesthetically clean, this creates a thermal nightmare. Both QLED and OLED TVs generate significant heat, and high-brightness settings required for a sunlit room push their power consumption—and heat output—to the maximum. Without adequate ventilation, this trapped heat can lead to thermal throttling, where the TV’s processor automatically reduces performance (including brightness) to prevent damage. In the worst-case scenario, it can cause premature component failure.
A second critical error is failing to account for glare management in the mount choice. A fixed mount gives you zero flexibility to counteract reflections from windows or overhead lights. A screen’s anti-reflection coating can only do so much. The ability to tilt the screen down by just 5-10 degrees can completely eliminate a distracting ceiling light reflection, dramatically improving perceived contrast and picture quality. This is where articulating or tilting mounts become essential tools for bright-room viewing, not just accessories.
Finally, structural integrity is paramount. Modern large-screen TVs are heavy, and QLEDs are typically heavier than OLEDs of the same size due to their backlight structure. Relying on drywall anchors alone for a display over 50 pounds is a recipe for disaster. Ensuring the mount is secured directly into wall studs is non-negotiable for safety and stability. One wrong move during installation or one failed anchor can lead to catastrophic screen damage.
Action Plan: 5-Step Guide to Heat-Safe TV Mounting
- Verify manufacturer clearance requirements: Check the manual for the recommended spacing behind the TV for ventilation (typically 2-4 inches for high-brightness displays).
- Select an articulating or tilting mount: Prioritize a mount that allows for both glare management and improved airflow over a fixed flat mount.
- Calculate optimal tilt angle: Aim for a 5-10 degree downward tilt to deflect common reflections from ceiling lights and high windows.
- Ensure mount attachment to wall studs: For any display over 55 inches or 50 pounds, use a stud finder and secure the mount directly to the wall’s structural frame.
- Leave ventilation gaps: Do not block the top and bottom ventilation slots of the TV and ensure there is a clear path for hot air to rise and escape from behind the panel.
4K vs 8K: Is the Upgrade Visible at a 3-Meter Viewing Distance?
The push towards 8K resolution is the latest frontier in the TV market, promising four times the pixels of 4K for unparalleled detail. For homeowners, the question is simple: is it worth the significant price premium? The answer, especially in the context of a typical living room, is almost certainly no. The ability to perceive the difference between 4K and 8K is entirely dependent on two factors: screen size and viewing distance. The concept of perceptual clarity is key—it’s not about the number of pixels on the screen, but the number of pixels your eyes can actually resolve from your couch.
For a typical viewing distance of 3 meters (about 10 feet), you would need a screen well over 85 inches to even begin to notice the benefits of 8K resolution. For most screen sizes (55 to 75 inches), your eyes simply cannot distinguish the individual pixels from that far away, making the 4K and 8K images appear identical in terms of raw detail. In fact, a 2024 IEEE study on viewing distances revealed that beyond a certain threshold (2H, or twice the screen height), the perceived quality difference between 4K and 8K was minimal to nonexistent, depending on the content.
In a bright room, the argument for 8K becomes even weaker. Ambient light and screen reflections act to reduce perceived contrast and wash out fine details. The subtle improvements in texture and depth that 8K might offer in a perfect, dark environment are the first things to be lost in a challenging lighting situation. You are paying a premium for a level of detail that your viewing environment will actively work to erase. Investing the money saved on an 8K TV into a model with better contrast, higher peak brightness, or superior anti-reflection technology will yield a much more noticeable improvement in picture quality in a bright room.
This is clearly demonstrated by a comparative analysis of how resolution is perceived in bright environments. The following table, based on industry standards, breaks down when, and if, you might notice the jump to 8K.
| Viewing Distance | 4K Perception | 8K Perception | Bright Room Impact |
|---|---|---|---|
| 0.5H to 1H (Very Close) | Full detail visible | Noticeably sharper | Glare reduces contrast, minimizing 8K advantage |
| 1.5H to 2H (Optimal) | Excellent clarity | Marginal improvement | Ambient light washes out fine detail differences |
| 2.6H to 3H (Typical Living Room) | Good overall quality | No visible difference | Screen reflections nullify resolution benefits entirely |
| Beyond 3H (Far Distance) | Adequate for most content | Identical to 4K | Brightness becomes more important than pixel count |
How to Fix Lip-Sync Delay on Smart TVs Connected to Soundbars?
You’ve invested in a premium TV and a quality soundbar, but you’re plagued by a frustrating problem: the actors’ lips move just before you hear their words. This audio delay, or lip-sync issue, is often a direct result of the TV’s video processing. To make an image look better, especially in a bright room, TVs apply numerous complex algorithms in real-time: motion smoothing, dynamic contrast adjustment, noise reduction, and AI-powered brightness enhancement. Each of these processes takes a few milliseconds, creating a cumulative delay known as processing overhead. The audio, which doesn’t require this heavy processing, is sent to your soundbar instantly via HDMI eARC, while the video lags behind.
This problem is frequently exacerbated by “Vivid” or “Sports” picture modes, which are designed for maximum impact in bright environments and therefore use the most aggressive processing. While they make the image brighter and more colorful, they introduce the most significant video delay. Switching to “Game Mode” is an excellent diagnostic tool. This mode is designed to minimize input lag for gaming by disabling almost all extra video processing. If the lip-sync issue disappears in Game Mode, you’ve confirmed that processing overhead is the culprit.
Fixing it involves finding a balance. You don’t want to sacrifice all the visual enhancements that make your TV look great. Most modern TVs and soundbars have an “AV Sync” or “Audio Delay” setting. This allows you to manually delay the audio signal to match the processed video. It requires some trial and error, but by making small adjustments (e.g., in 10ms increments), you can perfectly realign the sound and picture. A better long-term solution is to build a custom picture mode starting from the “Cinema” or “Standard” preset and individually enabling only the processing features you truly need, keeping an eye on any induced delay.
- Step 1: Diagnose with ‘Game Mode’. Temporarily switch to ‘Game Mode’. If the lip-sync issue vanishes, the cause is excessive video processing in your current picture mode.
- Step 2: Isolate the source. Return to your preferred mode and disable features like motion smoothing, dynamic contrast, and AI brightness one by one to find which one introduces the most latency.
- Step 3: Create a custom mode. Start from a low-latency base like ‘Movie’ mode and manually increase brightness and other desired settings, creating a balance between image quality and responsiveness.
- Step 4: Use audio delay compensation. In your TV or soundbar’s audio settings, use the audio delay function to add a small delay (typically 0-200ms) to the sound, bringing it back in sync with the processed video.
How to Use Supersampling to Sharpen VR Visuals Without Lag?
In the world of virtual reality (VR), “supersampling” is a technique used to create a sharper, more stable image. It works by rendering the game’s visuals at a much higher resolution than the headset’s display can actually show, and then shrinking that image down to fit the screen. This process effectively averages multiple pixels into one, resulting in smoother edges (anti-aliasing) and finer texture detail. The trade-off is that it requires immense graphics card power, and if pushed too far, it introduces significant lag. This concept from VR has a direct and important parallel in your television: upscaling.
Most of the content you watch—whether from streaming services, cable, or Blu-ray—is not in your TV’s native 4K or 8K resolution. It’s the job of the TV’s internal processor to “upscale” that 1080p or 720p source to fit the millions of pixels on your screen. Like supersampling, this isn’t a simple process of stretching the image. Sophisticated AI-powered processors analyze the image frame-by-frame, identifying objects, sharpening edges, reducing noise, and intelligently “creating” the missing detail. A high-quality processor can make a 1080p source look almost like native 4K, while a poor one will produce a soft, blurry, or artifact-ridden image.
This is where the battle between flagship OLED and QLED models is often won or lost. It’s not just about the panel, but about the “brain” behind it. In a bright room, the processor’s job becomes even harder. It must not only upscale the resolution but also intelligently adjust contrast and brightness to compete with ambient light, all without introducing the lag we discussed earlier. When you’re choosing a TV, you’re not just choosing a panel technology; you’re choosing a processor and its specific upscaling and image enhancement philosophy.
Why Overlaying Schematics on Reality Reduces Assembly Errors?
In advanced manufacturing, augmented reality (AR) is used to reduce errors by overlaying digital schematics directly onto a worker’s view of a physical object. This provides clear, in-context instructions, eliminating ambiguity and improving accuracy. Let’s borrow this concept and apply it as a metaphor for the television viewing experience: your TV’s image is the “schematic” being overlaid onto the “reality” of your bright living room. The biggest source of error, or visual degradation, in this scenario is screen reflection. If the overlay is obscured by glare, the entire experience is compromised.
This is a critical area where OLED and QLED technologies have different structural advantages and disadvantages. A typical QLED TV has several layers: the LED backlight, a diffuser, the quantum dot film, the LCD matrix, and a final glass panel. Each layer interface is a potential point for internal and external light reflections, which can reduce contrast and create a “hazy” look in bright light. OLED panels are simpler. Since each pixel is its own light source, there is no backlight, resulting in fewer layers. This simpler construction generally leads to lower reflectivity, which is a significant advantage in a bright room.
However, QLED manufacturers have invested heavily in developing advanced anti-reflection coatings. High-end models often feature specialized screen filters that are remarkably effective at absorbing ambient light and minimizing glare from windows and lamps. The effectiveness of these coatings can often be a more important factor than the underlying panel structure. When shopping, it is crucial to observe the TV screen while it is *off* in a brightly lit store to see how well it handles reflections. A screen that looks like a murky gray mirror is going to perform poorly, regardless of its peak brightness.
While you can watch an OLED TV in a bright room, they were made to be watched in darker rooms, where their deep blacks can best be appreciated.
– Display Technology Comparison Analysis, Which TV technology is better for bright rooms: QLED or QD OLED?
Key takeaways
- True bright-room performance is about light control (handling reflections and contrast), not just maximum brightness (nits).
- High-brightness picture modes often introduce processing lag, leading to issues like lip-sync delay with external audio systems.
- Factors beyond the screen, such as proper wall mounting for heat ventilation and understanding the limits of resolution at a distance, are critical for optimal performance.
Can Smart Home Devices Really Save You 20% on Energy Bills?
The conversation around smart devices often includes promises of energy savings, but what about the energy consumption of the largest screen in your home? The choice between OLED and QLED has a direct and measurable impact on your electricity bill, a factor driven by their fundamentally different approaches to creating light. This concept, known as luminous efficiency, measures how much light is produced for a given amount of power. In a bright room, where high brightness is a necessity, this efficiency becomes particularly important.
QLED TVs use an LED backlight that is always on when the TV is in use. The brightness of this backlight is relatively constant, regardless of whether the scene is bright or dark. An OLED TV, by contrast, is a self-emissive display where each individual pixel generates its own light. To display black, a pixel simply turns itself off completely, consuming zero power. This means an OLED’s total power consumption is directly proportional to the average brightness of the image on screen. A dark, moody film will consume significantly less power than a bright, snowy nature documentary.
In general, analysis of display energy efficiency shows that QLED TVs consume approximately 15% more power than OLED displays during typical mixed-use viewing. In a bright room scenario where both TVs are set to a high brightness level (e.g., 80% of their max), this gap can widen, as the OLED is running closer to its peak consumption more often. However, the QLED’s consistently high-power backlight often still results in a higher overall energy cost, especially on Mini-LED models with thousands of dimming zones to power.
While the annual cost difference may not be astronomical, it’s a tangible factor that contributes to the total cost of ownership over the TV’s lifespan. The following estimates, based on data from testing labs like Tom’s Guide, illustrate the potential financial impact of your technology choice in high-brightness scenarios.
| Display Technology | Typical Power Consumption (55-inch) | High Brightness Mode | Annual Cost Estimate |
|---|---|---|---|
| OLED (Standard Use) | 60-120 watts | Increases significantly with bright content | $45-85 per year |
| OLED (80% Brightness) | 100-140 watts | Required for bright room viewing | $70-100 per year |
| QLED (Standard Use) | 100-180 watts | Consistent regardless of content | $75-130 per year |
| QLED (80% Brightness) | 140-200 watts | Typical for bright room scenarios | $100-145 per year |
| Neo QLED (Mini-LED) | 140-160 watts | More efficient than standard QLED | $85-115 per year |
Now that you’re equipped with a deeper technical understanding of how these technologies truly perform under pressure, the final step is to apply this knowledge to your own unique space and needs. Begin by assessing your room’s ambient light sources and your primary viewing habits to determine which technology’s core strengths—the absolute contrast of OLED or the raw brightness of QLED—will provide the most benefit for you.